June 01, 2023
DIY Pond Aeration
Complete Guide for Installing a Pond Aeration System
Updated: 5/5/26
With careful planning and diligence, setting up a DIY pond aeration system is manageable and can save you a significant amount of money. Below is a step-by-step guide for installing an aeration system.
Planning for Installation
Determine your goal:
What are you trying to get out of your aeration system? Are you trying to reduce algae and other organic matter and improve water clarity? Are you trying to increase the fish population? If yes, what type of fish are you trying to grow? Do they need a specific temperature to thrive? Are you trying to prevent fish kill in the winter? This information is important as we work through the set-up.
Power source:
Choosing your power source impacts the balance of the installation. Utilizing AC electricity is the easiest and often most cost-effective solution, certainly in the short-term. However, sometimes electrical power is too far away. In that instance, solar or wind power can be very effective, but the installation process becomes more complex, and the up-front cost is significantly more. If solar is of interest, check out our article on DIY solar aeration: https://www.hiblow-usa.com/2021/06/07/diy-solar-pond-aeration/
Pond size and depth:
The size and depth of the pond is essential to understand before proceeding as it impacts which size and type of aerator you need, the diameter of the tubing, and the type of the diffuser. Take careful measurements and note the shape of your pond.
Choosing aeration technology:
The 3 most common aeration technologies for homeowners are: fountains, rocking pistons, and linear diaphragm air pumps.
- Fountains are visually appealing and provide some aeration to the pond, however they are considered surface aerators only pulling water from the top couple of feet. They are often used in addition to subsurface aeration. They require a significant amount of energy, so are not typically powered by solar or wind.
- Linear diaphragm air pumps and rocking pistons provide subsurface (bottom diffused) aeration. Subsurface aeration adds dissolved oxygen to the pond, but most importantly, mixes the oxygen rich surface water throughout the water column. The oxygen starved water at the bottom of the pond is cycled to the surface where it releases toxic anoxic gas into the atmosphere while absorbing oxygen.
Two common types of subsurface aerators:
- Linear Diaphragm (HIBLOW) Air Pumps are typically used for relatively shallow water up to 10’ (13′ with HIBLOW Adjustable Height Diffuser). HIBLOW is the inventor of technology and handles pressure better than the competition. If using a different brand, you may consider staying within 6’. Linear diaphragm pumps are very quiet, energy efficient (with most models running on less than 75 watts of power), easy to maintain, and generally less expensive than rocking piston pumps.
- Rocking Piston Air Pumps are typically used for deeper water applications beyond 10’ in depth. Some models can reach as deep as 50’ making the technology perfect for larger ponds and lakes. They are typically noisy, more expensive than linear diaphragm aerators and maintenance is much more complex and expensive. They also consume much more electricity.
The remainder of the article will focus on HIBLOW’s linear diaphragm technology, although most of the information will be helpful for rocking piston air pumps as well.
Choosing the installation location
If you are installing a solar system, then your aerator will likely be located right next to the pond.
If you are utilizing AC electricity, then there are a couple of options:
- Running electrical power to the water’s edge: We have heard of many folks hiring electricians and running power to the water; however, it can be very expensive considering the labor involved and the wire gauge needed to run long distances.
- The most common location is near your electrical power source. It is typically more cost effective to run tubing from your power source to the water’s edge – even hundreds of feet. The downside is that running tubing long distances adds backpressure if not properly sized. Also condensation can form in the line which can add backpressure if it’s not purged regularly.
Choosing the best HIBLOW model:
Reference your notes on the size, shape and depth of your pond and check out our article regarding choosing the best system for your application. https://www.hiblow-usa.com/2021/04/12/what-size-air-pump-should-i-use-to-aerate-my-pond/
Tubing type and size:
If you are planning on installing the aerator at the electrical source, it is most cost effective to buy PVC pipe, reinforced poly, or irrigation tubing and run that to the edge of the water. If burying the tubing, make sure it can handle the weight of the earth or it may pinch which will reduce or eliminate air flow and put excess pressure on the pump causing it to fail prematurely.
Choosing the right diameter tubing is essential. Generally, the longer the pipe distance, the larger the diameter of the tubing needs to be to reduce friction loss and limit back pressure. Also, the more air flow (bigger the pump), the larger the diameter of the tubing needs to be.
Once to the water’s edge, weighted line is most often used, but not required. Some folks choose to save money by running rigid PVC or flexible poly into the pond. Of course, this requires bricks or cement blocks to weigh it down.
For detailed information on selecting the best tubing for your pond, please check out the following article: https://www.hiblow-usa.com/2020/06/16/what-size-and-type-of-tubing-should-i-use-with-my-pond-air-pump/
Diffuser quantity and type:
The diffuser sits at the bottom of the pond and produces microbubbles that rise to the surface. HIBLOW typically suggests a medium bubble diffuser that produces sufficient air bubbles for oxygen transfer but also enough power to mix the pond.
Medium bubble diffusers put minimal backpressure on the air pump and “self-clean”. However, fine bubble diffusers are sometimes the best choice if you have a shallow pond or are trying to grow certain breeds of fish.
The quantity of diffusers depends on your pond size and shape. For instance, if you have a round pond that is 1/8th of an acre, you may need only 1 diffuser to turnover the pond. If you have a kidney shape ½ acre pond, you may need 3 diffusers. Most systems utilize at least 2 diffusers.
Manifold/ air valves:
If you are planning on installing more than 1 diffuser, you will need to purchase or build a manifold to split the line. Valves are essential when using multiple diffusers as air will flow on the path of least resistance (to the shallowest diffuser). Valves allow you to even out the air flow.
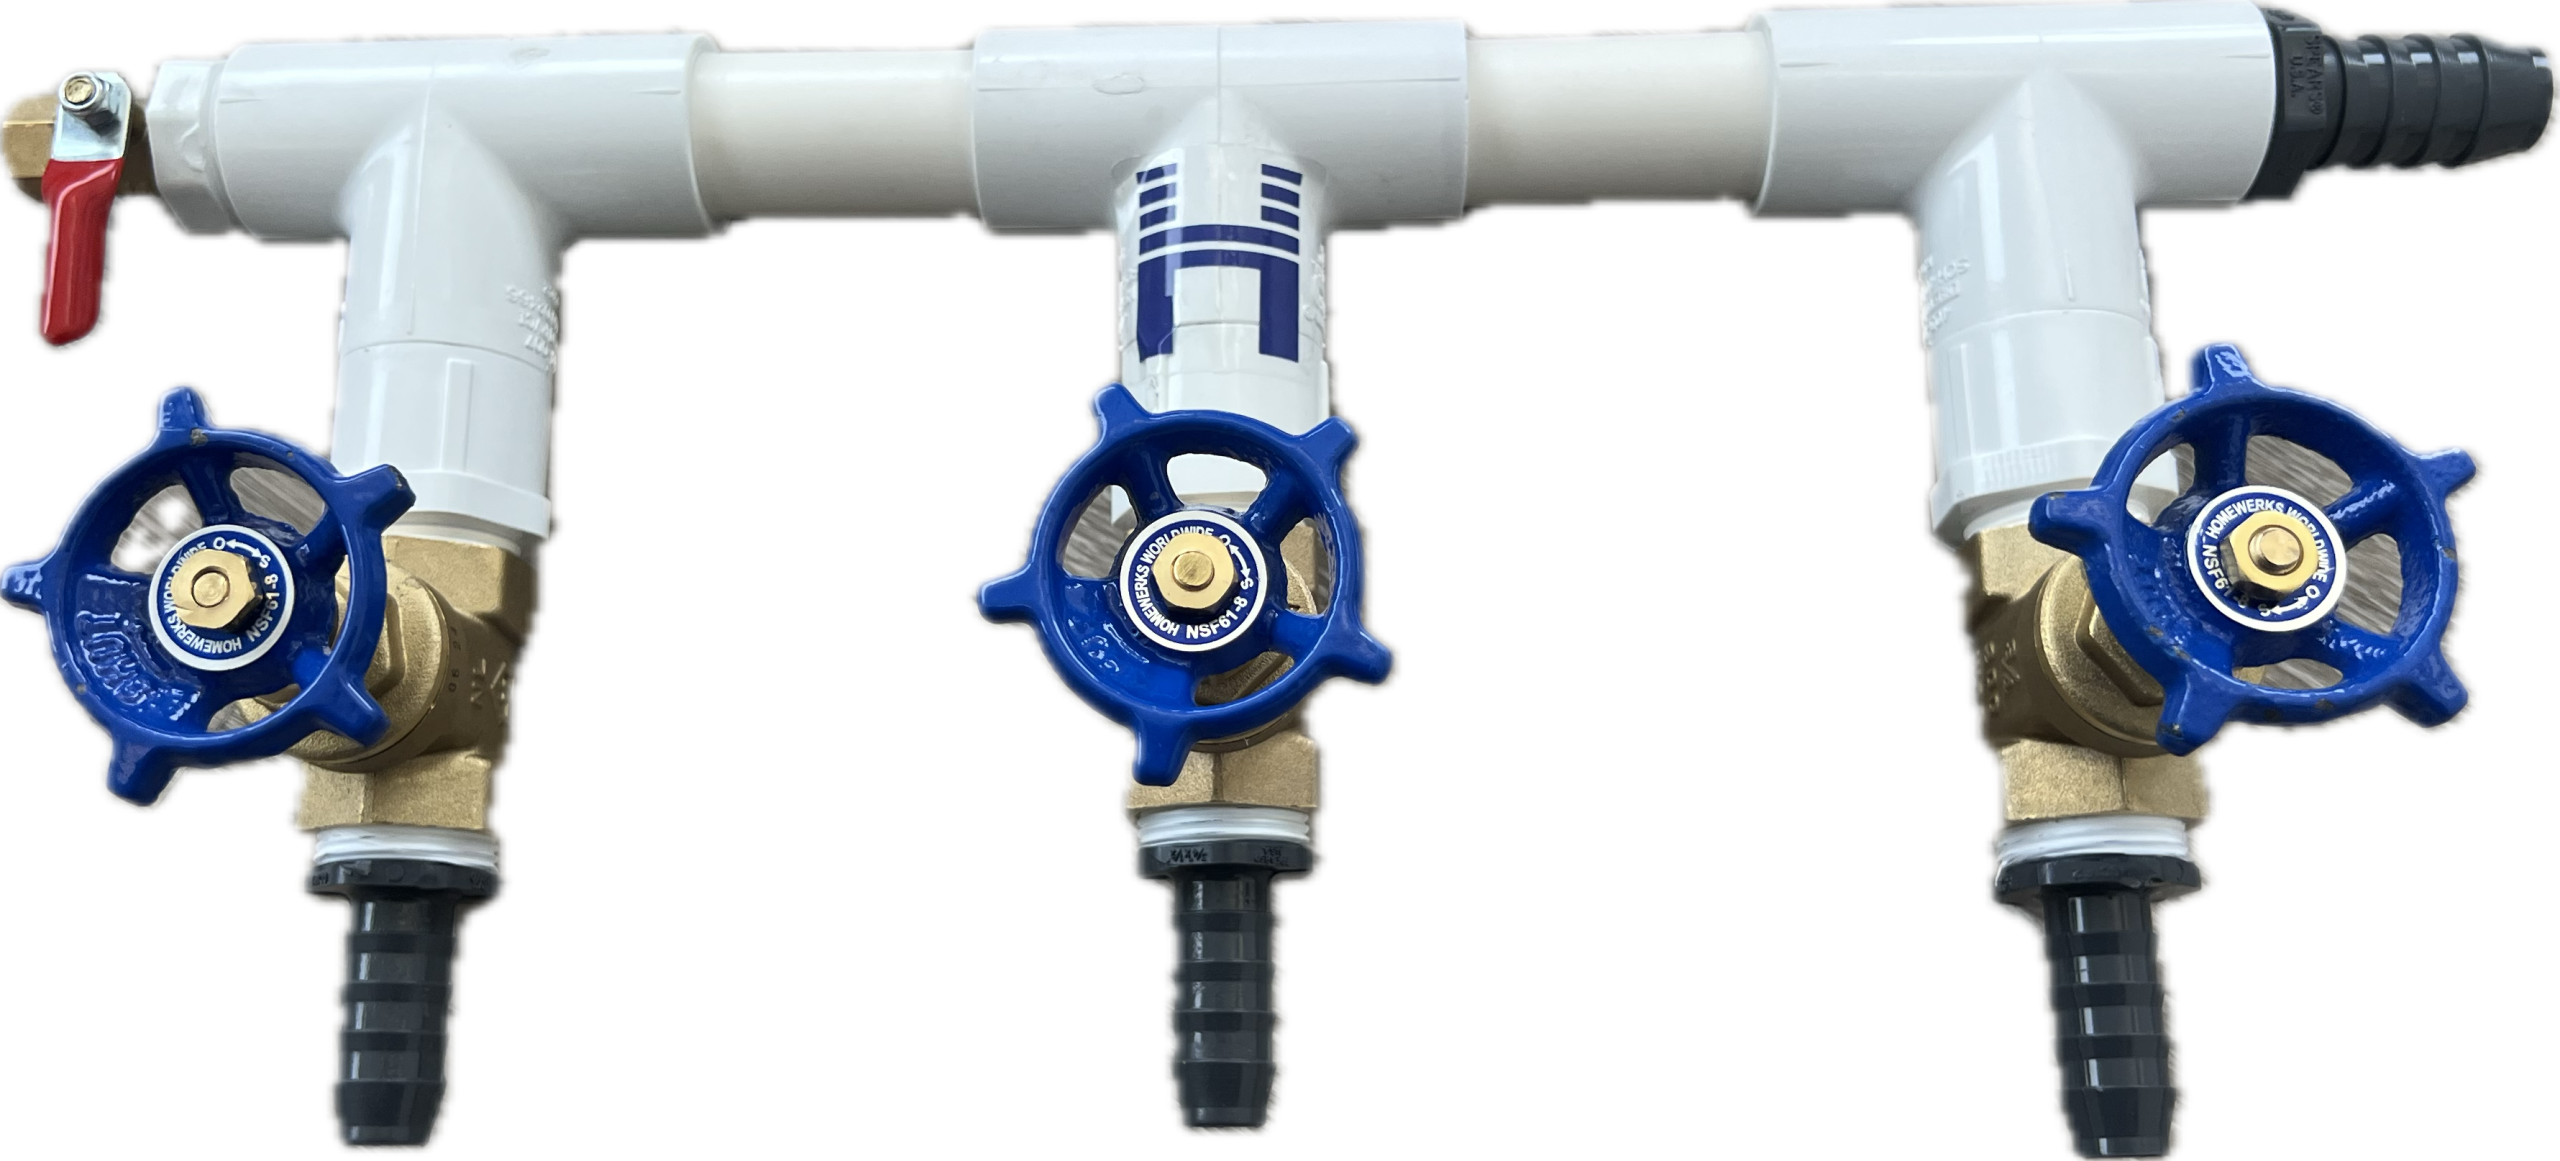
HIBLOW Precision Airflow Control 3-Valve Manifold
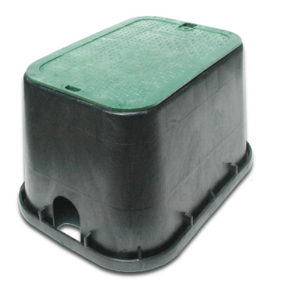
If you want to cover the manifold, a simple valve box available at any hardware store works great.
Diffuser depth:
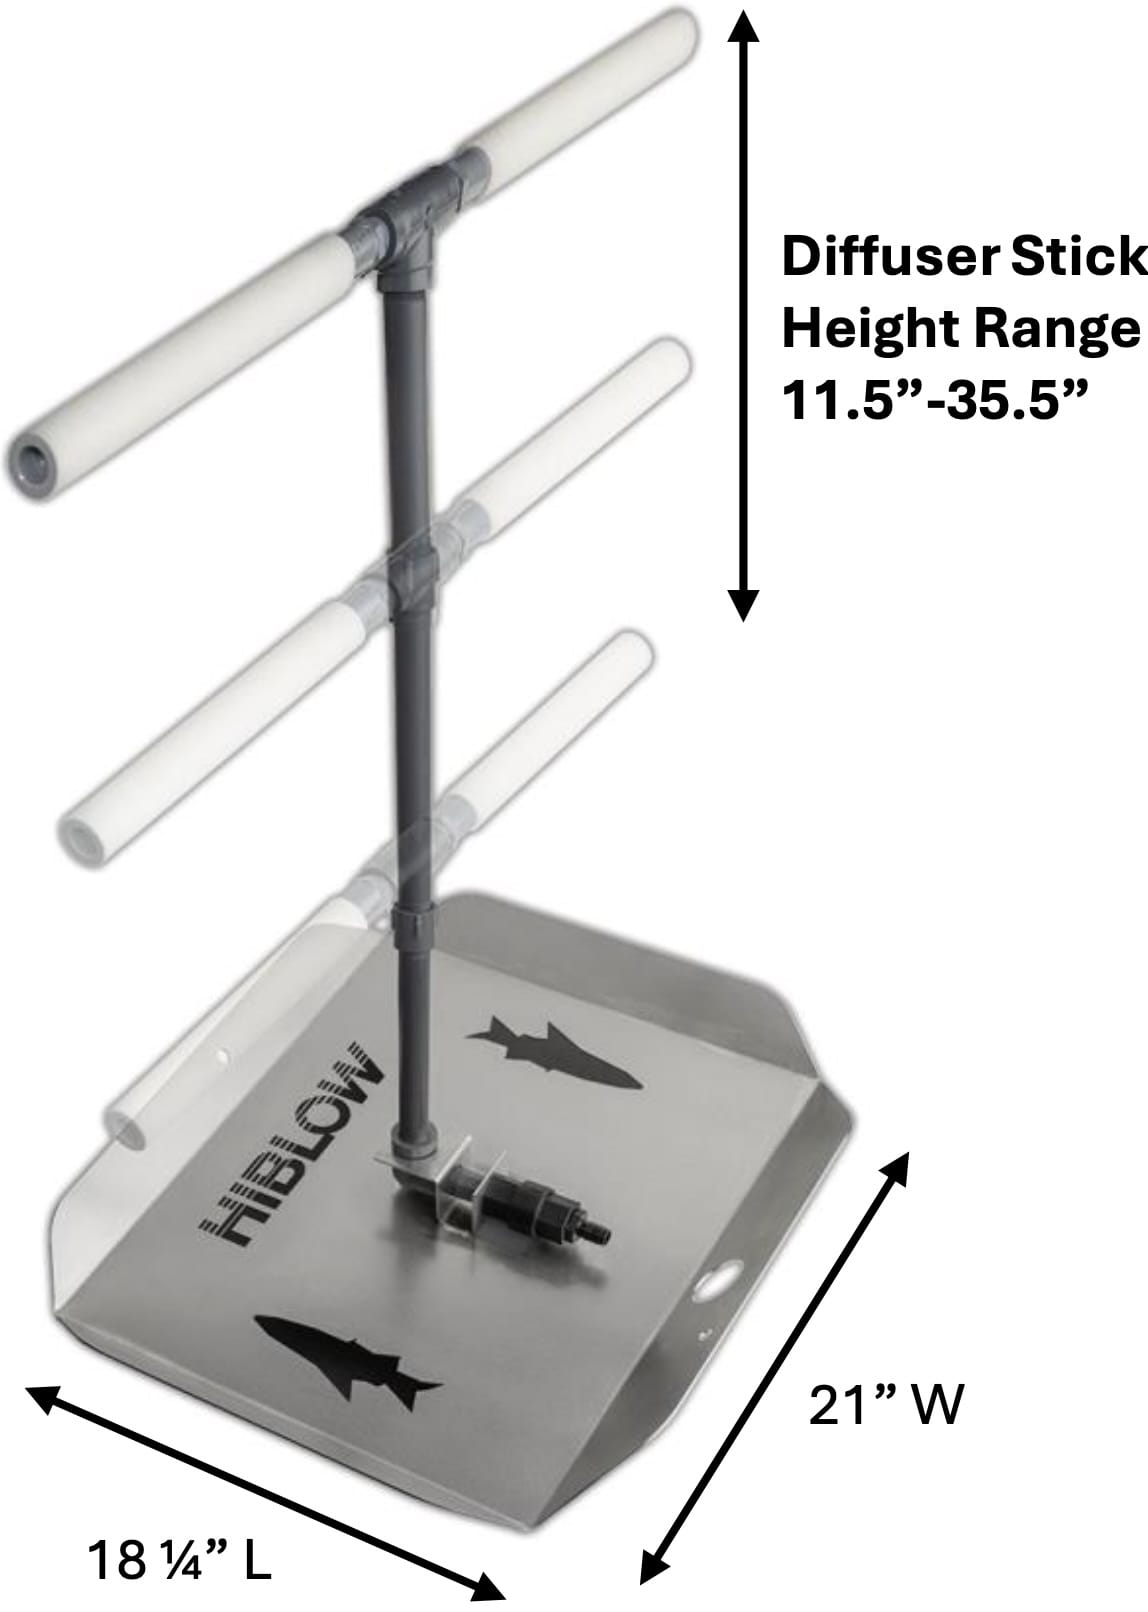
Most linear diaphragm air pumps can’t handle depth’s past 6′. HIBLOW aerators can handle depths up to 10’, but with HIBLOW’s Adjustable Height Diffuser, a HIBLOW pump can be used up to 13′ depth (at the diffusers highest setting). Learn more here about HIBLOW’s Adjustable Height Diffuser and it’s benefits: HIBLOW Adjustable Height Pond Diffuser
Setting up a HIBLOW Aeration System
Step 1: Find a good spot to place your aerator:
If possible, install the pump in a shaded area with ample air circulation. Heat is the enemy of the diaphragms – the cooler the environment, the longer the aerator will last. The pump is rated outdoor UL, meaning it can stand alone and withstand the elements. Possible locations: under a deck, in a shed, in a boat house, in a crawl space, on the northside of the house, or even in the open under a tree. If you are installing it in a sunny area, building an enclosure with as many open sides is prudent. Avoid fake rocks and other enclosures with minimal air circulation. For the base, many folks use pavers from a local hardware store. Do not plug the air pump in yet.
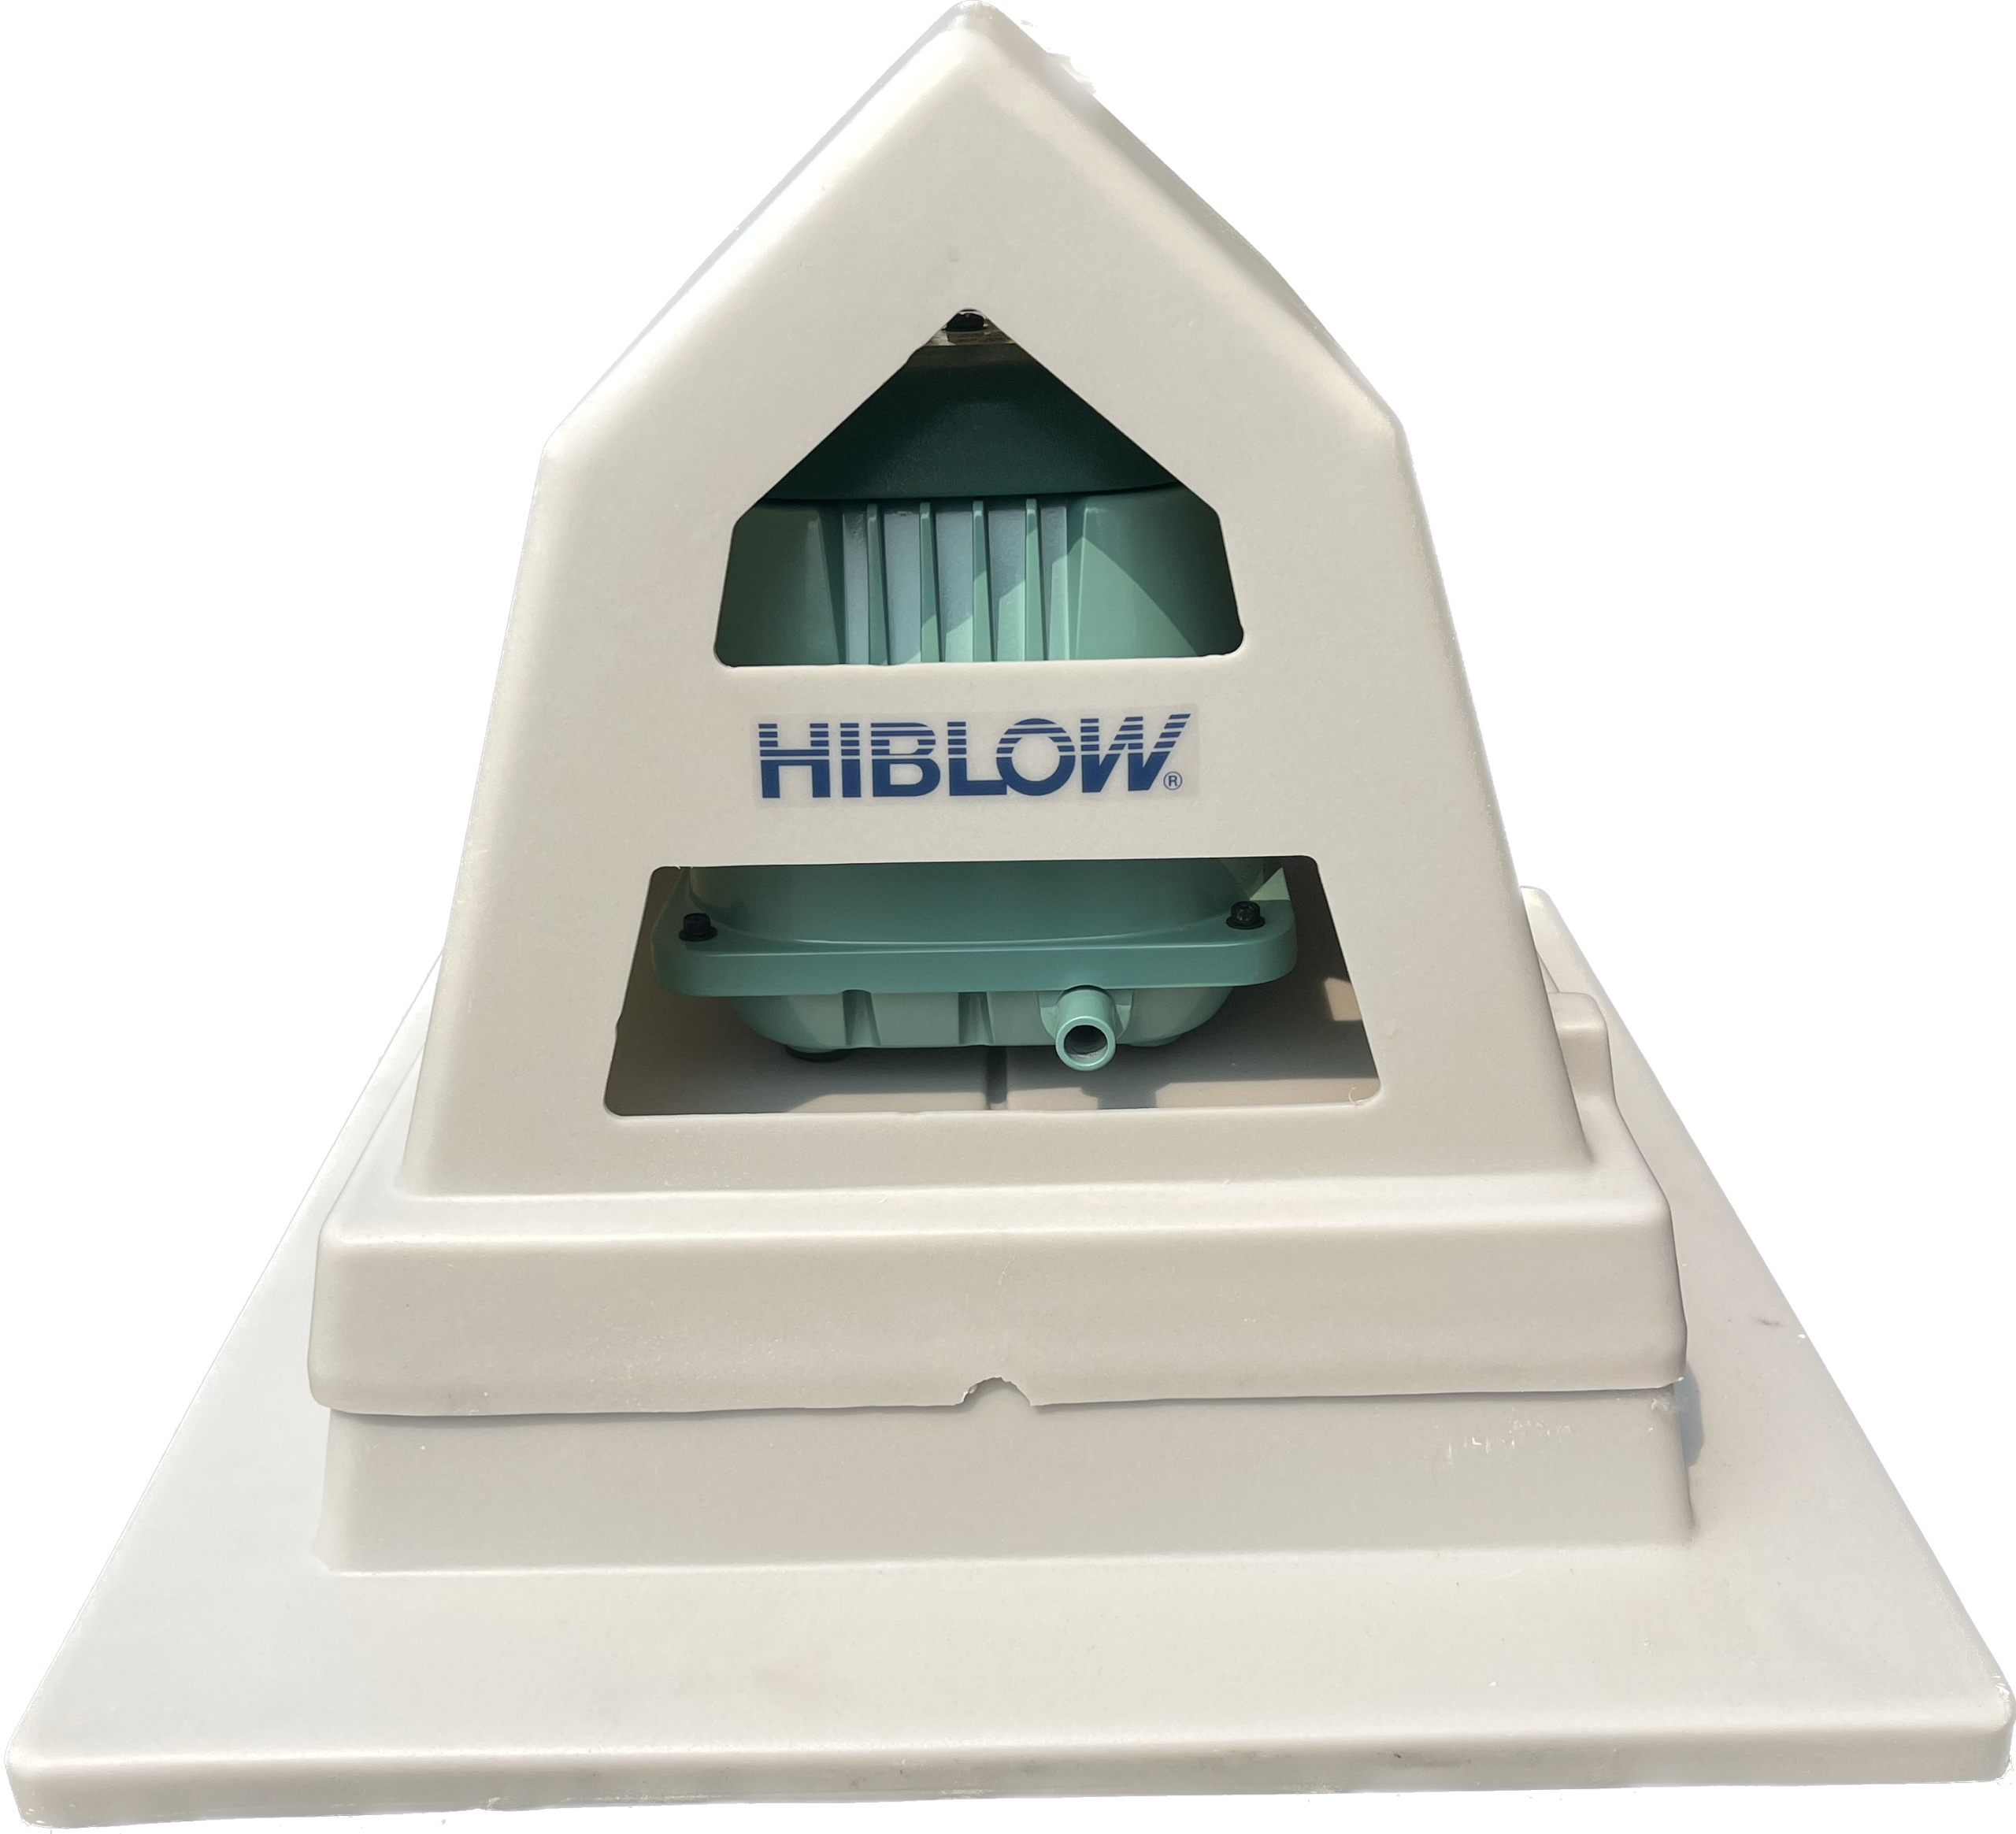
HIBLOW Pond Aerator Enclosure
Step 2: Connect tubing to your aerator outlet port:
*Note: if you purchase a HIBLOW pond aeration kit, all fittings are included.
All HIBLOW models except for the HP-150 and HP-200 come with a 5/8” ID L tube in the box which stretches over the 0.71” outlet port of the pump. The HP-150 and HP-200 come with a stepped-up straight hose with an ID of 5/8” that stretches over the outlet port and an ID of 1” on the other end.
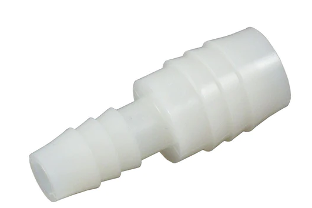
To connect your airline to the 5/8” L tube, most use a 5/8” OD barb fitting and reduce it down or up based on the ID of the airline you plan on using. For instance, if you are connecting 1/2” weighted line, you could buy a male-to-male barb that is 5/8” on one side and ½” on the other. If you are using rigid PVC pipe, the ½” L tube stretches over ½” PVC pipe. You can buy couplers to reduce down or up from there. Most hardware stores can assist with your project.

The concept is the same when connecting to the 1” straight hose that comes with the HP-150 and HP-200.
Step 3: Burying your tubing:
If installing your aerator at the water’s edge, skip to Step 5. If you are running airline to the water’s edge, most professionals suggest burying the tubing 4-6 inches below the surface. Reinforced poly tubing is easiest to work with because it comes in longer lengths than PVC and is flexible. Just make sure it can handle the weight of the earth and doesn’t pinch. If using PVC pipe, you will need to use couplers to connect the tubing. If you need to maneuver the tubing, we suggest 22- or 45-degree elbows to reduce friction loss.
Step 4: Connecting tubing to weighted line – 1 diffuser:
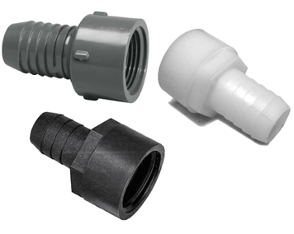
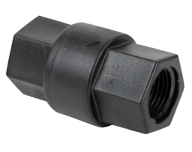
If you plan on installing only 1 diffuser all you need to do is connect the tubing to the weighted line. If you used flexible poly tubing a male-to-male barb will suffice. If using PVC pipe, you will likely need a female to male barb as shown below.
Step 5: Installing the manifold:
See HIBLOW Manifold Instruction manual for detailed instruction.
Step 6: Connecting the diffuser to the weighted line:
Most homeowners use weighted line because it is flexible, sinks, and is easy to move around. Some diffusers come with different size barbs to connect to common weighted line sizes such as 3/8”, ½”, and 5/8”. The barbs will reduce to fit the plumbing of the diffuser. Many diffusers, including HIBLOW’s have check valves. If yours does not, you may consider buying a check valve, especially if you are not running 24/7, 365. When air must overcome water in the line, it can add stress to the aerator and reduce the life of the diaphragms. Make sure that the tubing is securely clamped to the diffuser so that air can’t leak.
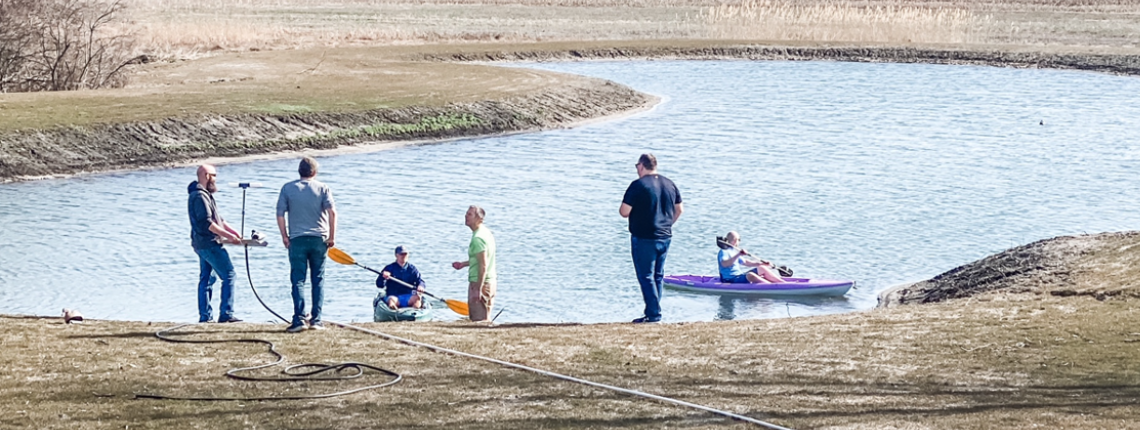
Step 7: Dropping the diffuser(s) in the pond:
If you have a shallow pond, it is very possible to wade out to the desired location and drop the diffuser in. It is best to carry the diffuser and not drag it behind the hose. This prevents the connections from breaking. Many people use a kayak to drop the diffuser in the pond. It is best to drop it carefully and let it sink naturally.
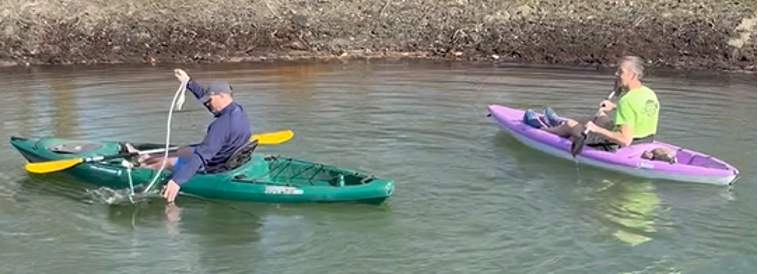
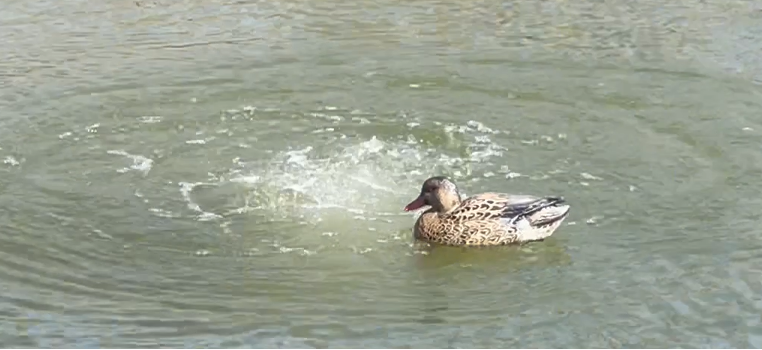
You may consider tying a duck decoy to the rope that attaches to the diffuser. This will allow you to easily access the rope and pull up the diffuser. We suggest checking the diffuser periodically to make sure it hasn’t clogged.
Step 8: Start it up:
Plug the aerator in and make sure you are seeing bubbles at each diffuser location. We suggest starting with the furthest diffuser and working your way to the closest diffuser. HIBLOW’s manifolds provide incremental adjustments making it much easier to balance. A standard ball valve design makes it more difficult.
***If you have an older pond and/or significant muck at the bottom of the pond, it is best to start off slow. The organic matter at the bottom of the pond is anoxic (lacks oxygen). If you mix it too quickly into the water column, it will diminish your dissolved oxygen throughout the pond which could lead to murky water and fish kill. Many people start off running an hour the first day and double the duration each day after until you reach 24 hours.
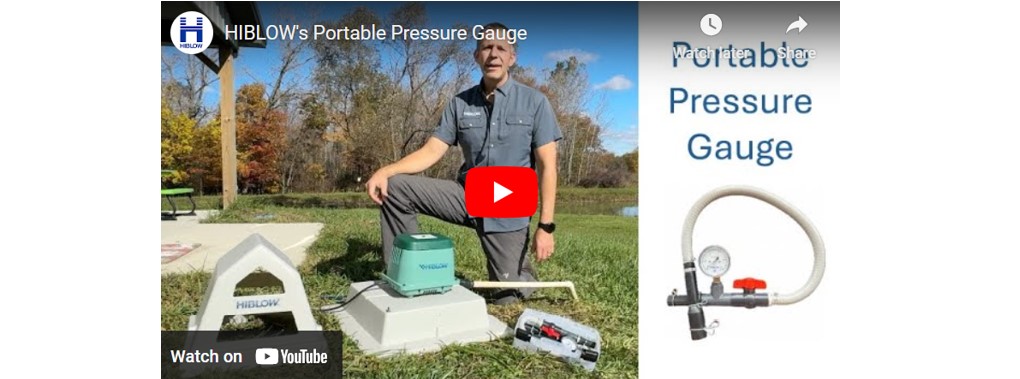
Step 9: Test the system pressure (optional):
Testing the system pressure after installation and periodically after can increase the life of your aerator. We suggest checking every 6 months. An increase in pressure can mean that the diffuser has clogged, or the depth of the water has increased. If the reading is low, you may have a leak in the airline.
Click here to learn more: HIBLOW Portable Pressure Gauges
We Can Help with DIY Pond Aeration!
Through many years of true DIY experience we have developed accessories to go with our air pumps and now sell full kits for ponds up to 1+ acre. Need help with sizing? Click here: https://www.hiblow-usa.com/2026/04/23/what-size-pond-aerator-do-i-need/
Buy pond aeration kits here: https://www.hiblow-usa.com/product-finder/pond-aeration-packages/
More Pond Aeration Content
- DIY Pond Aeration
- How to Calculate Backpressure
- What Type of Diffuser Should I Buy for My Pond?
- How Water Depth, Pipe Size and Diffuser Type Affect Longevity
- DIY Solar Pond
- For all HIBLOW pond aeration content click here
Author: Mike Miner